
Monday, July 26, 2010
Refrigerator Pickles

Refrigerator Pickles
4 Kirby Cucumbers. 1 lb. quartered
3/4 cup white wine vinegar
1/4 cup small sweet onion, thinly sliced
2 cloves garlic, smashed
2 tablespoon sugar
1 tsp dill seed
1 tsp black peppercorns
1 bay leaf
Kosher Salt
>>Place cucumbers, in 1 quart jar
>>In a bowl, combine vinegar, onion, garlic, dill seed, sugar, peppercorns, bay leaf, 2 tsp salt and 3/4 cup hot water. Stir until sugar dissolves.
>>Pour vinegar mixture into the jar with cucumbers. Cover and refrigerate at least 1 day before serving.


Easy Tomato Sauce
Easy Tomato Sauce
Ingredients
20 Roma tomatoes, halved and seeded
1/4 cup olive oil
1/2 teaspoon kosher salt
1 teaspoon pepper
1 cup finely diced onion
2 teaspoons minced garlic
1 tablespoon finely chopped oregano leaves
1 tablespoon finely chopped thyme leaves
1 cup white wine
Directions
Preheat oven to 325 degrees F.
In 2 (13 by 9-inch) pans place tomato halves cut side up. Sprinkle with oil, salt and pepper, onion, garlic, and herbs.
Bake tomatoes for 2 hours. Check the tomatoes after 1 hour and turn down the heat if they seem to be cooking too quickly. Then turn the oven to 400 degrees and bake another 30 minutes.
Remove from the oven and process tomatoes through a food mill on medium dye setting over a small saucepan. Discard skins.
Add white wine, bring to a boil, reduce heat to low and cook for 5 minutes.
**I am going to can this sauce following my Water Bath Canner's Instructions
Monday, July 19, 2010


How My SFG Grows - July 19

How My SFG Grows - July 19
Can you see all the Tomatoes?

Here is a close up.
I am thinking BLT's this week!
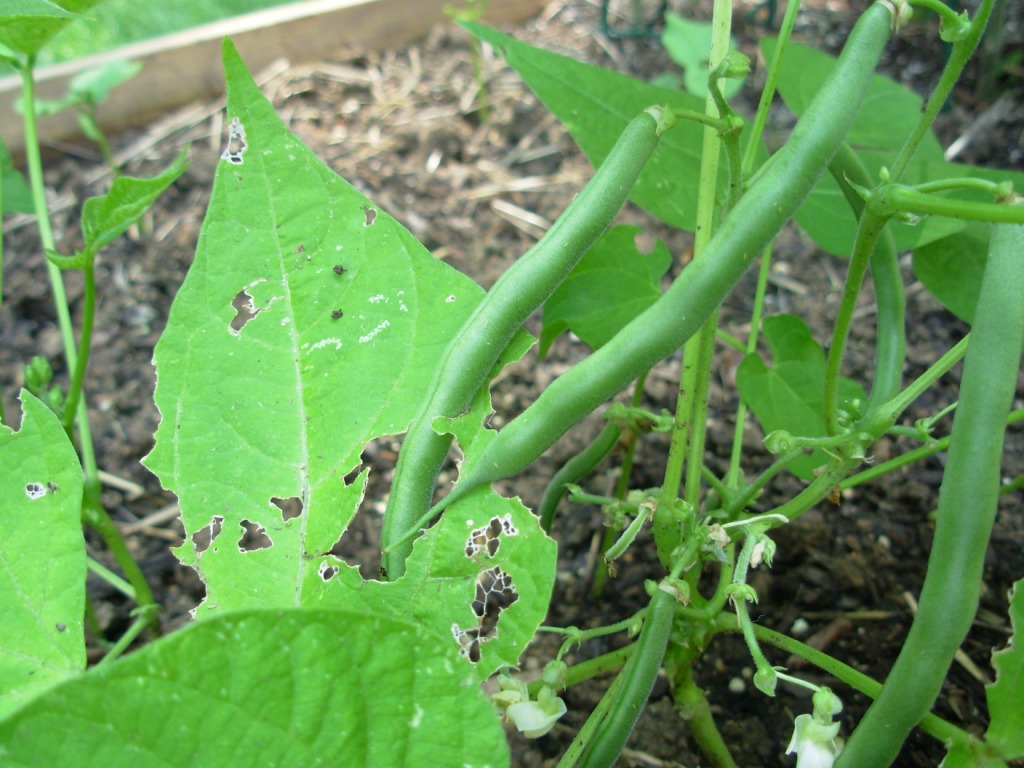
We even have some green beans!

Carrots have been growing!

It has been HOT here.
The lettuce is about done.
I cleared some and planted more spinach
Friday, July 16, 2010

Wen

I have watched the Wen presentations on QVC for a long time. I did not order thinking it was too good to be true. I was using 6 products on my short, thick, color treated hair to get the shine and volume I like. I thought there was no way a 1 or 2 products could replace all that.
Let me tell you something......It works and works great! My hair has never been better.
I liked the size and variety in this discovery kit. It is a great way to try the Wen products.
Thanks Chaz and QVC for bringing us this quality product.
Links to Amazon if you would like to try Wen:
Thursday, July 15, 2010
How to make Pickles- revisited
The cucumbers are looking great. It is almost time to make some Pickles!
Here is a post I did on how to make Pickles.
Enjoy!
http://thebarberbunch.blogspot.com/2008/07/im-in-pickle.html
Here is a post I did on how to make Pickles.
Enjoy!
http://thebarberbunch.blogspot.com/2008/07/im-in-pickle.html
Tuesday, July 13, 2010
How to freeze Spinach
How to freeze Spinach
Say the word spinach and some people will cringe while others mouths will start to water. Whether you like spinach or not, it is a great provider of iron, calcium, lutein, chlorophyll, magnesium and vitamins A, C, E, and K. Spinach is eaten raw, boiled, stir fried and steamed. You can find spinach in soups, casseroles, salads and egg dishes.
Spinach is easy to grow and that leads us to how to freeze spinach. When picking spinach for freezing, pick the young tender leaves. You must wash the spinach. Use a colander and make sure that you get all of the sand, dirt and grit washed out. The 3 methods are very similar and all are equally easy.
How to freeze raw spinach.
Wash spinach. Trim off any bad spots on the leaves and trim the stems. Put into a colander and let the spinach drain very well. Use paper towels to help absorb even more water. Put into freezer bags or freezer containers and mark the date. When you freeze spinach with this method, be prepared for the spinach to not hold its shape when it thaws. It's great to put into soups and things like egg dishes though. The flavor is still there.
How to freeze spinach using steam.
Wash and trim the spinach. Get the utensils you use for steaming and let the spinach steam for 1 minute not to exceed 2 minutes. I use this method a lot and like it. When the spinach is steamed, I cool it and drain it in a colander. I dab it with paper towels and get as much liquid off of it as possible. I use freezer bags and date it. For me, steaming the spinach before freezing it helps to hold onto the nutrients. It also allows me to do small bunches at a time. (DO NOT over load the steamer with too much spinach.) When I use this method, I use the spinach in dishes such casseroles, but I also fix the spinach straight out of the bag, steamed and eaten alone. We like to add olive oil and a pinch of vinegar.
How to freeze spinach using boiling.
Wash and trim the spinach. If you are going to use the boiling method, you need to use a basket. Put the spinach in the basket, bring the water to boiling, CAREFULLY lower the basket in the boiling water. Do not exceed 1 ½ minutes. Gently and carefully lift the basket out of the boiling water. Cool the spinach and again, dab it with paper towels to remove excess liquid. I have used this method too. I prefer steaming to boiling. I think there are more nutrients left in the steam method and I don't have to worry about getting splashed with the boiling water as much. But I did it this way for years with great success. After you have removed the liquid, put the spinach in freezer bags or in freezer containers.
Monday, July 12, 2010
How My SFG Grows - July 12

Here is my Square Foot Garden on July 12 2010
The Tomatoes are growing strong.
We got some turning red!
Almost time for some BLT's


The Cherry Tomatoes were probably 6 to 7 foot tall!
Then we had some storms with high winds last week.Most of the stems broke where the cages stopped.
I trimmed them all up and they seem to be doing well.

I took the pepper plants out.
They were just not growing. I am not sure why though.
I worked the dirt and planted some more
green beans

Carrots and spinach are doing well!

Lettuce is doing great too.
We had salads last week for dinner
with the Mesclun mix.
The Tom Thumb Lettuce will be ready this week I think!
I ended up pulling the mint plant out. It was starting to wander
and spread. I read you really need to keep them in check to
keep them from overtaking an area.
So your out Mint!

Here are the Blackberries!

Mandy was supervising while I was working in the Garden.
Good Job Mandy!
Saturday, July 10, 2010
Get Ready

FiFO Can Rack - SMALL & MEDIUM CANS
Product Description
The ultimate food rotation rack capable of storing a massive amount of canned goods. The FiFO Can Rack is large enough for any situation. The most comprehensive rotation rack FiFO Storage™ has built to date, the FiFO Can Rack is a mammoth-sized food storage shelf made for those who are serious about storing food.
● Front loading technology.
● Stores up to 510 soup-size cans. Depending on your can sizes, the capacity of your system will vary.
● Each system is 72" tall, 36" wide, and 24" deep
● Store cans as small as tuna or as large as bulky fruit cans.
● The FiFO Can Rack's durable steel frame is rated to hold over 5000 lbs.
● Trusted quality from the FiFO Storage™ brand
The patented front-loading technology allows for maximum storage capacity in limited space. Because of the first-in-first-out technology, you'll never have to go behind the system for can storage or access. The Can Rack allows you to quickly organize your storage area and it automatically rotates cans. As you pull each can from the bottom row the other cans automatically rotate. Each section is adjustable to any width of can up to 30 oz.
At The Ready Store, we always focus on the QUALITY of our products first, rather than quantity because we want you to get the best value for your hard-earned money.
I get all my supplies from The Ready Store
Go to the Side Bar to click the banners and links
Friday, July 9, 2010
What's for Dinner- Mama's Taco Casserole
Mama’s Taco Casserole
Servings: 4 to 6
Prep time: 5 to 10 minutes
Cook time: 40 to 45 minutes
Total time: Less than 1 hour
Ingredients:
1/4 Cup Margarine
1 package taco seasoning
1 pound ground beef, cooked and drained
15 ounce can refried beans
1/4 Cup water
1/2 Cup BBQ Sauce
1/2 Cup Milk
2 Cups instant mashed potato flakes
Directions:
Melt margarine in saucepan.
Add milk and 2 Tablespoons taco seasoning mix. Remove from heat and stir in potato flakes.
Press potato mixture into bottom and slightly up the sides of an 8×8 inch baking dish.
In skillet, place ground beef, re-fried beans, barbeque sauce, water, and remaining taco mix. Cook and stir until bubbly. Turn into prepared crust.
Bake uncovered at 350 for thirty to thirty five minutes.
Serve with cheese, lettuce, tomatoes, onions, sour cream
Wednesday, July 7, 2010
Go Away Ants
Go Away Ants!!!
We are being invaded by ants! I was doing some on line searching for ways to get rid of them. Here are a few interesting ones I found:
Mint Tea
Brew some strong mint tea and spray it on their pathway...they won't cross it.
Tape
Wrap double stick tape around legs of table, chairs, or whatever, that should stop them in their tracks.
Drown them
Run a rod down in the top of their anthill and...
Pour soapy water (1/4 cup liquid hand soap and 1 gallon water) into their ant hill.
Also you can,
Pour a boiling mixture of (Boil 3 gallons of water, add 4 cups of citrus peels in a pot, simmer 15 minutes).
Salt
Sprinkle salt in their pathway.
Petroleum Jelly
Rub fairly thick on whatever you're wanting to keep them off of.
Lemons
Put lemon slices where you don't want them...they don't like tangy scents.
Cucumbers
Scatter cucumber pieces on the ground in the area you are having trouble, they don't like them.
Mint
Scatter fresh mint in the problem area. If this is a picnic "spot", etc. plant some mint, that should deter them.
Cloves
Mix up a spray bottle with a cup of vinegar and a tablespoon of ground cloves and spray their trail.
Eggshells
Sprinkle eggshells around the troublesome area, they don't like them.
Sticky Trap
Place petroleum jelly, corn syrup,honey or something similar on a paper plate and you'll find several stuck in their tracks.
Borax
Set out shallow containers of equal amounts of borax, alum, sugar and flour mixed (with enough water to make a batter). Keep out of reach of children and pets though.
Mix 1 cup borax, 2/3 cup sugar and 1 cup water in a bowl. Dip cotton balls in mixture and place along their trail. When they eat them, that's all she wrote... Again, keep out of reach of children and pets.
Artificial Sweeteners
Pour a few packets of the generic version of the stuff in the areas that the ants are frequenting, and watch 'em disappear. I've had great luck with both the kind that comes in the pink, and the blue, packets (aspartame and saccharine). It's cheap, it works, and it won't kill your pets or your kids.
Cornmeal
Sprinkle in troublesome areas, they'll eat it...it swells in their stomachs and they die.
Flour
Pour a line of flour around the problem area. They won't cross it.
Baby Powder
Sprinkle in the troublesome area. They won't cross the powder.
Athlete's Foot Powder
Same as with the flour and baby powder. Sprinkle in problem areas...apparently they don't like white powder.
Boric Acid Solution
Combine a small amount of boric acid, sugar and hot water in a spray bottle and swirl mixing thoroughly. Boric Acid can be purchased at any discount retailer ,under the name Borax. Make sure to keep this away from pets or children as it is hazardous. This is a good option for long term control.
Bleach Solution
Combine a small amount of bleach with hot water in a spray bottle and swirl mixing thoroughly. Make sure to keep this away from pets or children as it is hazardous. This is a good option for long term control. Using the name brands, like Clorox, does not add any additional killing power.
Ammonia
Spray Window cleaner liberally and watch them stop in their tracks, dead. This is a good option for short term control. It will have to be reapplied to be effective as the ants appear.
Oatmeal or Grits
Leave a few pieces of instant oatmeal or grits (some sort of water absorbing food) out where the ants are appearing. Get it as close to the nest as possible. The ant will take it back to the nest and eat it. Once eaten the food expands essentially popping the bug. Nice visual huh? Cruel but effective and non toxic. This option has to be applied frequently.
Now, if you don't want to kill the ants, but just want to keep them away from a particular area like a garden etc place a few drops of peppermint essential oil in a spray bottle and fill with water. Spray this generously around the area but try to avoid the plants themselves.
Cinnamon
I sprinkled it heavily on the hills. Ants were gone completely in about 3 weeks, but definitely saw a difference in one week. I repeated every 2 months during summer. Then only needed it twice a year for the next year and now I use it once a year as a preventive. Plus the garage smells great! This is the best thing ever. Worked on red ants and black ants, that I know of. Make sure you know where they are coming from and sprinkle there.
Subscribe to:
Posts (Atom)