Showing posts with label Food Storage Series. Show all posts

Tuesday, February 14, 2012

Bean Soup with Sausage

Bean Soup with Sausage

Created by Carolyn Barber


1 can diced tomatoes

1 can chicken broth

1 cup water

1 envelope Lipton Onion Recipe Soup and Dip Mix

1 tbsp chili powder

4 cans black beans

1 dinner sausage cut into slices


Mix all ingredients.

Heat to boiling.

Reduce heat and simmer for 30 minutes


·       I used a mix of black beans and great northern beans

·       I used turkey sausage to make it a little healthier

Thursday, June 16, 2011

Make your own Oatmeal Packets

Homemade Instant Oatmeal Packets


Super easy homemade instant oatmeal packets put boxed packets to shame!

Ingredients

• 3 cups Quick-Cooking Oats

• 1/2 Cup Brown Sugar

Directions

1. In a food processor pulse 1 cup of oats until coarse powder.

2. Mix powder oats with whole oats and brown sugar in large bowl.

3. Mix in your flavor options…listed below.

4. Place 1/3 Cup Oatmeal Mix in each ziploc bag or single serve container.

5. To serve: Empty packet into a bowl. Add 3/4 cup boiling water or hot milk. Stir and let stand for 2 minutes.

6. For thicker oatmeal, use less liquid – for thinner oatmeal, use more liquid.


Notes
Gluten Free- Make sure you buy Certified Gluten Free Oats.
Dairy Free- Do not use powdered milk option. Use Milk alternative as liquid for creamy oatmeal.

Possible Mix Ins (Customize it to your taste)
-Craisins/Raisins
-Any Type of Dried or Fresh Fruit
-Cinnamon
-Powdered Milk (for a creamy taste)
-Sprinkles
-Pop Rocks
-Chocolate Chips

Tuesday, June 14, 2011

Wednesday, June 8, 2011

Look what My Husband got me!

It's a Food Storage and Rotation System from Shelf Reliance!

Food storage management has never been easier thanks to the Harvest 72". Featuring patented front-loading technology that automatically rotates cans on a first in first out basis, the Harvest 72" is the largest, most popular food rotation system offered by Shelf Reliance. This FRS is easy to adjust for different can sizes and boasts the capacity to hold 460 cans. With its easy-fit design and unique features, the Harvest 72" makes food storage management a breeze.

Before and After photos in process!

He is downstairs cussing..... I mean putting it together now.


*linking to Homestead Revival Preparedness Challenge

Saturday, May 14, 2011

What's for Dinner - Mango Chicken Almond Salad


Today is the last day in our series in using our
#10 Can of Freeze Dried Mango Chunks.
If you don't have the food storage ingredients in the recipe,
just substitute for what you have or
go to Emergency Essentials and get some.

I think this would make a great dinner salad on a hot summer's day.

Have you thought of any recipes to use Mango Chunks in?

Leave a comment and let me know.


(click on the pic to make it bigger)

Monday, May 9, 2011

What's for Dinner - Mango Banana Frozen Yogurt


Continuing with the series on using our Freeze Dried Mango Chunks.

Note: For this recipe you will need an ice cream maker

(you can make this bigger by clicking on it)

Thursday, May 5, 2011

What's for Dinner - Mango Muffins


Today we are going to make Mango Muffins with our
# 10 Can of Freeze Dried Mango Chunks
from Emergency Essentials.


(you can make this pic bigger by clicking on it)

Tuesday, May 3, 2011

Food Storage Haul

Due to reports of food prices rising and having some extra money, I ordered some food storage items.

White Sugar
Brown Sugar
White Flour
Wheat Flour
Shortening Powder
Scrambled Egg Mix
Dry Milk


Our current Food Storage Series of Using your Food Storage Everyday.
So it kind of good timing that my order arrived today.

Food Storage items are sealed in #10 cans and
on an average will store YEARS.
But I encourage you to use your storage items everyday.
It saves money and saves time.

All this cost me less than $150.00


~~~~~~~~~~~~~~~~~~~~~~~~

Monday, May 2, 2011

What's for Dinner- Mango Wheat Bread


I recently got a #10 can of Freeze Dried Mango Chunks from Emergency Essentials.
I have been looking for other ways to use them besides making smoothies and adding them to my homemade yogurt. Emergency Essentials is a great resource for emergency preparedness products. They are also a great resource for recipes and ideas for using your food storage too.

Here is a recipe I found on their site:

Mango Wheat Bread
1 cup Freeze Dried Mango Chunks- (reconstitute before using)
1/4 cup hot water
1/2 cup white sugar
1/2 cup Dehydrated Fat Free Milk (Do Not reconstitute)
1/2 yogurt
1/2 cup Sunflower Oil
2 cup whole wheat flour
1 teaspoon baking powder
1 teaspoon baking soda

1. Preheat oven to 350 degrees. Grease a 9" loaf pan.

2.Place mango, water, sugar, milk powder, yogurt and oil in blender. Blend until smooth. them pour into a bowl. In a bowl sift together wheat flour, baking powder and baking soda. Fold flour mixture into mango puree.

3. Bake in preheated oven until toothpick inserted in center comes out clean. 30 to 45 minutes.

Can't wait to make this......sound so good!


*linking to Homestead Revival Barn Hop

Tuesday, April 26, 2011

Super Easy Pineapple Upside Down Cake

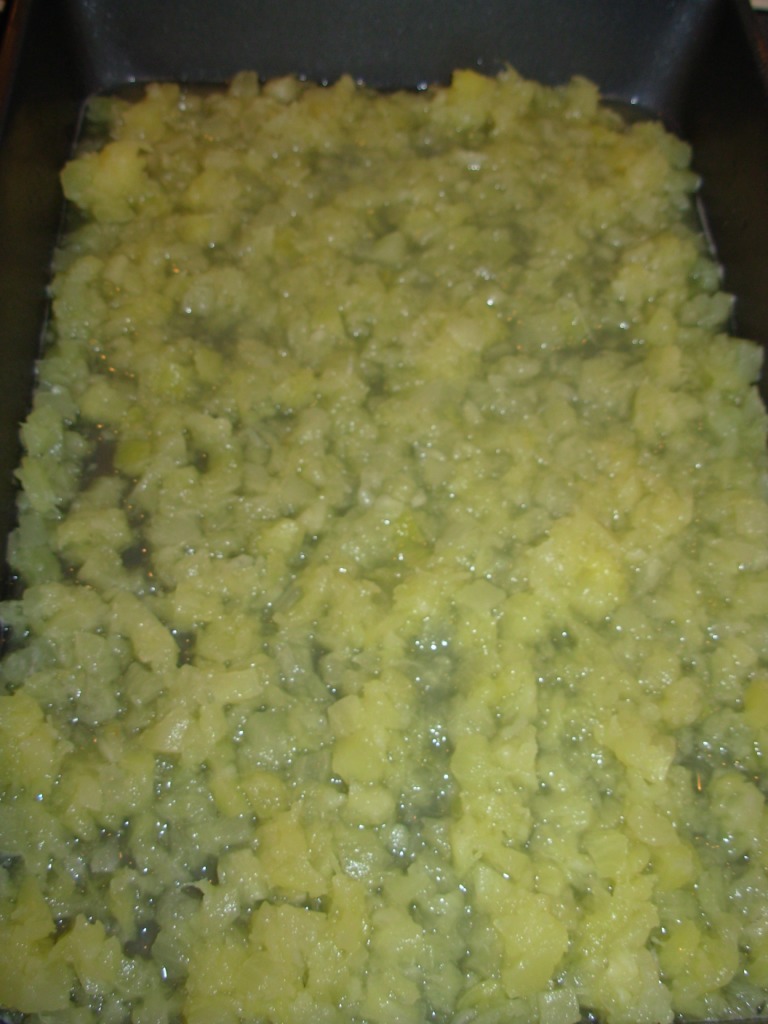
I had some crushed pineapple that need to be used in my food storage.
I was thinking..... now what can I do with this???
Then I saw the yellow cake mix and said.....Pineapple Upside Down Cake!!


I prepared the cake per box instructions but I used whole egg powder instead of fresh eggs.
I always have whole egg powder on hand.
Makes it easy to bake when you don't have any fresh eggs.


I drained a little of the juice of the the pineapple and
then spread it in the bottom of a 13 x 9 pan.
You could also use round pans.
You can also add maraschino cherries at this point if you wanted too.


Next, I sprinkled about 2 cups of brown sugar over the pineapple.


Place the cake batter on top of the pineapple mixture and
bake per package directions.
 375 degrees for 35 minutes.


Here it is just out of the oven.
Doesn't look like much......
But when you cut it and flip the piece of cake over

Ta Da!!!!!


Pineapple Upside Down Cake


Couldn't be easier and it all came from my food storage!!!

What's for dinner- Au Gratin Potatoes with Magic Mix


What is Magic Mix??
It’s a great mix containing powdered milk, butter, and flour which makes perfect white sauces every time! 

Watch a video on how to make Magic Mix here at Everyday Food Storage. You can also find great recipes for using the Magic Mix here too.

Magic Mix
Ingredients:

2 1/3 C. Powdered Milk
1 C. All Purpose Flour (Yes, use All Purpose)
1 C. (2 sticks) Margarine or Butter, at room temperature

Something about using this intimidated me. I have had the mix in my fridge for a couple months and have not tried using it. Today..... I said no more!!  I am making Au Gratin Potatoes!!!


I re hydrated some Potato Slices from my Food Storage.
Didn't measure but probably about 3 cups.


In a saucepan, I warmed 1 1/4 cups water on low.
When the water is warm I mixed in the magic mix with a whisk.
I let that warm thru for a minute or two and then added 2 cups of cheese and my Potatoes.


I placed the mixture in a baking dish.
I added some salt and pepper to the top.
Then bake at 375 degrees for 30 minutes
 
 
And here you have it..............Au Gratin Potatoes from your Food Storage!
 

And now for the close up..............


This was so easy!!! Why didn't I do this before!!!
 
 
You can use Magic Mix to make:
White Sauces
Cream Soups
Alfredo Sauce
Macaroni and Cheese
Au Gratin Potatoes
Pudding
Fudge Pops
and More!!

Monday, April 25, 2011

8 Rookie Mistakes made by New Preppers

8 Rookie Mistakes
Courtesy of Ready Nutrition


Don’t Panic
Take a deep breath, sit down and make an emergency plan. Decide what emergency you are preparing for and what supplies you will need. Try and stay within a certain emergency time frame and work your way up to larger scale emergencies. For example, begin planning for a 72 hour emergency and work your way up to a short term emergency and later, a larger scale or long term emergency.

Take your time and properly plan how you are going to open up your budget so that you can attain these emergency items. Cutting out the extraneous spending in your budget can free up a lot of extra cash. The money saved can be used toward your future preparedness items. Make the choice of using the new found preparedness money or save it for a more expensive prep. Either way, you will accumulate a little at a time and not break the budget.

Personal Experience – One mistake I remember (and am still paying for) was when my husband and I decided to get a short term food supply. We hadn’t really researched what it takes to maintain your family’s health during a short term emergency so we impulsively went out and bought $200 in canned goods. Needless to say that we are still living off of that canned good investment. Looking back, we could have used that $200 in a more constructive manner.


Don’t always believe the experts.
Listen to what the experts say, but make the decision that is best for your family and your needs. Some expert’s advice is driven by what makes them the most money or what other experts are saying at the time. Make a list of what items you are looking for and research those items (include reading the customer reviews).

Personal Experience – An expert was telling everyone that they should have a certain brand of hiking boots. Well, I went out and bought them because “the expert” said I should. Because I didn’t research the boots (and the specs about the boot), after purchasing it; I made the realization that they were way too heavy for me. Luckily, I was able to return the boots and get my money back. After I researched and read customer reviews, I went out and invested in a different pair of hiking boots that were perfect for what I needed.


Don’t buy cheap preps.
Trying to save money here and there is great, but when you are investing in survival gear, you want to make sure the investment is worth the money spent. Begin looking at your purchase as an investment for your future. You want that product to last and do it’s desired function with minimal hassle. And you want to be able to depend on that product to see you through an emergency. On another note, whatever items or tools you buy, make sure you use it. If you invest money and buy an item that you do not know how to use, it’s useless.

Personal Experience – I wanted to save a few bucks and bought a basic sleeping bag that didn’t have any bells or whistles. Later on down the line, I realized the sleeping bag was way too bulky, weighed too much for a bug out situation and had no capacity to really keep someone warm. I ended up investing in an ultralight backpack that keeps me toasty when I need it the most and is feather light. Although I made a mistake with the first sleeping bag, I am using it as a back up, so the investment was not a complete loss. Other items I have found that are worth spending extra money on are good toothbrushes, survival tools, water filtration systems and survival knives.


Buy preps that are multi purpose.
You want to make the most out of your preparedness investment so do some extra research and find preparedness items that have multiple functions.

Personal Experience – I have found a lot of items that have multi uses, so listing them would be an entire article in itself. However, here are few suggestions that would help serve a multitude of functions. Rope, for instance is a great multi use prep. It can be used for hanging or securing emergency shelters, used as a laundry line or for hauling. Other multi-function items are a good knife, multi tool, and emergency foods, such as salt, baking soda, and vinegar.


Buy foods you and your family normally eat.
This is one of the biggest mistakes that preppers make. You want to use the food that you store. To get the most out of your food investment, develop good storage habits. Further, it’s a good rule of thumb to purchase foods and items that will be used within their allotted time span, so check the expiration date!

Personal Experience – I came across some cans of seafood medley at my local grocery store and thought how great it would be to use it in an emergency situation. I was so excited about this canned seafood because it was high in protein and vitamins, so I ended up buying 4 cans of this stuff. Needless to say that after opening 1 of the cans up for a dinner… my family (and myself included) pushed our plates aside and decided to eat cereal instead. Needless to say, the seafood medley was horrible. I donated the remaining cans of the seafood medley to a food bank.


Eat what you store.
In an article I wrote about storing food, I stated, “Storing food is a continual process of using, rotating and reloading. If a short term food supply is bought, the food must be used and more food purchased to resupply the storage shelf. Thinking of the food supply as a small store where the foods in the front has the shortest expiration date and the ones in the back have the longest. The food storage area should be checked every six months to make sure that appropriate food items are rotated. ”

Personal Experience – I can’t tell you how many items I have had to throw away unopened food because I didn’t use it within it’s expiration date. Using and rotating your food supply takes some getting used to. Many think that the stored food is for emergencies only. And it is, but it should also be there for you when you need it. It’s your own personal convenience store. When you use an item, buy a new one at the store and replace it on your shelf.


Have back ups for your back ups.
This is a golden rule for preppers. You never know when one of your preps will break or jam up on you. Having extra items gives you peace of mind because you are not solely dependent on one item for survival.

Personal Experience – When we were researching water filtration systems, we ended up buying a katadyn water filter (A solid investment in my opinion). However, we began thinking about the use and effectiveness of the filter after multiple uses. We decided that solely depending on one item to give up potable water was not wise. We not only bought extra filters for our katadyn, but also invested in micro-pur tablets (chlorine dioxide tablets), and chlorine granules to make sure that all areas were covered.


Get your friends and family on board.
In an emergency situation, you will need help from others. It would be unrealistic to think differently. Talking with friends and family about being prepared is a great way to awaken the need for their personal preparedness efforts and help you find more “like minded” individuals. Help guide them and give them advise on how to begin.

Personal Experience – We all have stories of people thinking we are “cooky” because we prepare for short or long term emergencies, and I am no different. I have learned to take other’s opinion in stride, but I have talked with some family and friends who see the need to prepare and have started doing so. My largest accomplishment thus far has been helping my sister become more prepared. I have peace of mind knowing most of my immediate family is prepared – at least for a short term emergency.

There will be some friends and family members who are not going to be on board no matter how much you try and talk to them. There will be some who will be on board and will listen to what you have to say. Hopefully, after you share your experiences and first time mistakes, they will listen and learn from you.


What are some prepping mistakes you have made?


I am an affiliate for The Ready Store


I will make 10% off of any sale made thru my website


So click the link or see the widget in the sidebar.


Thank you for your support

Expired Condiments


Special Report - Expired Condiments
courtesy of savingdinner.com

by Leanne Ely, C.N.C

Dear Friends,

Ladies, are you suffering from OCS? Old Condiment Syndrome? You know what I'm talking about. Crusty ketchup bottles, icky, old Ranch dressing and ancient mustard?

We all have as many condiments as we do cleaning supplies. Well, I know what you have in your refrigerator doors. Fossilized condiments! And more than a busy hotdog stand in New York City needs, too!

Did you know the refrigerated shelf life for mayonnaise is two months? It is! So guess what? Today is the day you get to toss that stuff and get a new one. Listen, if you don't use it often enough, buy a smaller jar. Even though it costs more money, it really is the cheaper way to go. You don't need nasty old mayo in your fridge!

Here are some more items you probably have languishing in the doors of your fridge or way in the back:

1-Mustard. Not just the yellow kind, but Dijon, honey mustard, brown mustard and that teeny, tiny jar of gourmet mustard from the gift basket you received over the holidays with the funky taste. No one likes it, but instead of throwing it out, you put it in the fridge. Why? Toss it! Shelf life: 6-8 months in the fridge; 2 years unopened in a pantry.

2-Jams and Jellies. The other day, I pulled out a raspberry jam that had a "best used by" date of 4/5/09. YIKES! I bet you have some of those too! Time to chuck them as well! Shelf life: 1 year in the fridge; 1 year unopened in the pantry.

3-Salad Dressings. A lot of commercial salad dressings have enough preservatives in them to embalm you. However, nothing lasts forever. If they've been opened for more than 3 months in the fridge, they've gotta go too. Unopened, they'll last a year in your pantry.

4-Pickles. I think I've had the same jar of pickles in my fridge since I've had the raspberry jam. The issue for pickles is they don't last as long as jam in the fridge! Only 1-2 months opened and in the fridge. For the pantry shelf? One year unopened. Time to boogie your pickles!

5-Ketchup. I don't even want to know how old my ketchup is. Let's just say probably from the same era as the pickles and the raspberry jam. Truth is, it's only good for about 2 months in the fridge. Unopened and on the pantry shelf, it can last a year before it needs tossing.

6-Salsa and Hot Sauce. Guess what? Once your hot sauce or salsa is opened, it's good for just a month in the fridge! Don't wait for it to mold; throw it OUT! Unopened, it's good for a year on your pantry shelf.


7-Olives. Oh yes, I confess. My olives are refrigerator pals with the jam, ketchup and pickles! Out they go today...they only last a month opened in the fridge. They'll last a year unopened in your pantry though!


Well, that's quite a condemning list, isn't it? The question is how to know how old everything is? One rule of thumb if there is no date on the jar or package and if you don't remember when you opened it, it's probably a good idea to toss it.

How can you avoid Old Condiment Syndrome? By marking your condiments on the label with a Sharpie (it will hold up to the refrigeration without smudging or smearing) with the date so you know. You might want to keep this list handy too in your Control Journal so you know how long to keep these items.

Last thoughts on this and then you can go cure the OCS in your fridge: unless you have a huge family or you're an overly zealous condiment using family, it's probably best to stick with supermarket sized condiments as opposed to the jumbo sized stuff that they sell in those warehouse stores. Bigger isn't always better.

Saturday, April 23, 2011

Easy Easter Dinner

I got this recipe from a friend of mine. This would be a cheap, easy Easter Dinner using your food storage items.

This recipe does not have a name yet. If you have a suggestion. Let me know!


4 Ham Steaks
1 can Pineapple chucks or tidbits
2 packages Stuffing Mix

Drain Pineapple, reserve fluid

Make Stuffing per package directions replacing some of the water with the fluid from pineapple.

After resting the prepared stuffing for a few minutes, place half in baking dish.

Place Ham Steaks on top of Stuffing. Cover with remaining Stuffing

Bake in 350 degree Oven for 30 minutes.

Serve and enjoy!

It doesn't look like much but it is really good.

The pineapple adds some unique flavor to the stuffing and the Ham Steaks stay nice and moist


~~~~~~~~~~~~~~~~~~~~~~~~~~~~~~~~~~~~

This post is linked in at the Homestead Revival Barn Hop

Food Cost to Rise

The most recent commodity reports show rising prices on flour, sugar, eggs and shortening due to steady demand and tight supplies. If you are low on these food storage staples, buy what you can afford. Sugar has risen from $48.60 / cwt in April 2010 to $61.00/ cwt in April 2011. It may take some time for prices to stabilize, so if you can find any decent sales on these items, replenish (or build) your supply.


Too much rain in the corn areas has delayed planting, so only a record corn crop will keep the supply from being depleted next year. Watch for case-lot sales on canned and frozen corn if your family enjoys this vegetable. I also store freeze-dried corn, which is compact and light-weight, retains the most nutrition, and rehydrates with sweet flavor.


With steadily increasing fuel prices, we are starting to see people cut back on their miles driven and some companies are charging higher delivery fees. It’s a good time to inventory your food storage supplies, see where items may be lacking and search for the best prices to replenish your supply. Consider whether your inventory has all of the ingredients for meals your family enjoys. Higher fuel costs will lead to rising food prices in general.


Be prepared, not scared!

Thursday, March 31, 2011

Food Storage Series- Dairy Products from Powdered Milk- Sour Cream and Cream Cheese

Next up in the Food Storage Series is Yogurt Cream Cheese and Greek Style Yogurt.

This time I made the milk from powdered milk. I used 2 quarts of water and 4 cups instant milk. I used my blender to mix the milk but you could also just mix by hand until all the lumps are out.


I followed the directions for making basic yogurt as outlined in this post from the book Making the Best of Basics Family Preparedness Handbook


Now you begin making the Yogurt Cream Cheese and Greek Style Yogurt.


Ingredients needed
•Prepared Plain yogurt

•Salt (optional)

Preparation:
1. Line a strainer with a double layer of cheesecloth, and place over a bowl.


2. Pour the plain yogurt into the strainer.


3. I left the yogurt to drain for 8 hours. I collected the whey that had drained off.


4. The yogurt left was the consistency of Sour Cream and that is what I intend to use it as.
This is also what is known as Greek Style Yogurt.


Attempting to show consistency.
I think you can see it better
in the shot below.


5. I reserved some of  the Greek style yogurt and wrapped it tight in the cheese cloth. I then filled a bag with some water and placed it on top of the cheese cloth. This will act as added weight and drain off more of the whey.


6. I let it drain for an additional 4 hours.
The yogurt left was the consistency of cream cheese
and that is what I intend to use it as.


Again, attempting to show consistency.
I think you can see it better in the shot below.


It is pretty amazing that you can get 3 different dairy products from 1 thing.
The yogurt tastes like yogurt, the Greek style yogurt tastes just like sour cream and the yogurt cheese tastes just like cream cheese. I added no seasonings or anything. The flavor changes just by the amount of drain time.
All this takes a little time commitment but the overall process in not hard at all.

Tips:
1. Use your yogurt cheese as a substitute for cream cheese, sour cream or mayonnaise. You can use it in recipes for dips, spread, sauces and dressings.

2. If you don't have cheesecloth, you can use a coffee filter or an old (but clean) pillowcase instead.

3. Save the whey that drains from your cheese, and use it in place of the liquids in baked goods recipes for some extra protein.

Thursday, March 24, 2011

Yogurt and Augason Farms


The yogurt turned out great! It was a little thinner than store bought yogurts but that didn't bother me and I found that after being in the refrigerator it did thicken up. From what I read on the internet you can thicken the yogurt by using powdered milk or gelatin.

I decided to use 8 oz jelly jars to store the yogurt. From the half gallon of milk I got 11 jelly jars of yogurt. So for less that $5.00 I got 11 jars on yogurt!

The process was really easy. The time commitment was the only "bad thing". Just be mindful of your time and plan ahead to do heating and cooling of the milk during the day and the culturing overnight.


~~~~~~~~~

I also found a new company to get Food Storage items from. It is Augason Farms.


The prices are cheaper than other Food Storage Companies. I was also pleased to find that
Sam's Club offers their products also.
 
Augason Farms offers interesting combo packs. This time I ordered the "Starter Pack".
It has a nice variety of food storage items.
 
The Starter Pack included
Whole Eggs
Instant Milk
Beef Flavored Vegetarian Meat Substitute
Instant Potatoes
Freeze Dried Strawberries
Freeze Dried Sweet Corn
 
I was excited about the variety in the Starter Pack.
I have been wanting to try the meat substitute and the freeze dried veggies and fruits.
And then the idea struck me that I can use the Strawberries in the yogurt I made!!
 
 
This is what the Strawberries look like in the can.

 
Re Hydrating the Strawberries in warm water
 
Cut up Re Hydrated Strawberries


Add the Strawberries to Yogurt and Stir


Yum!
 
 
**I also cut up the freeze dried Strawberries as is and mixed them into another container of yogurt.
I want to see if the step of re hydrating the Strawberries could be skipped.
I will let you know how the experiment turns out.